Play
Dynamically assemble and match players

In this guide, we will do a quick rundown of how to initialize and authenticate your users with the AccelByte Unity SDK. While this guide is Unity specific the flow is identical in any other SDK.

You can grab our SDK from our public GitHub: https://github.com/AccelByte/accelbyte-unity-sdk
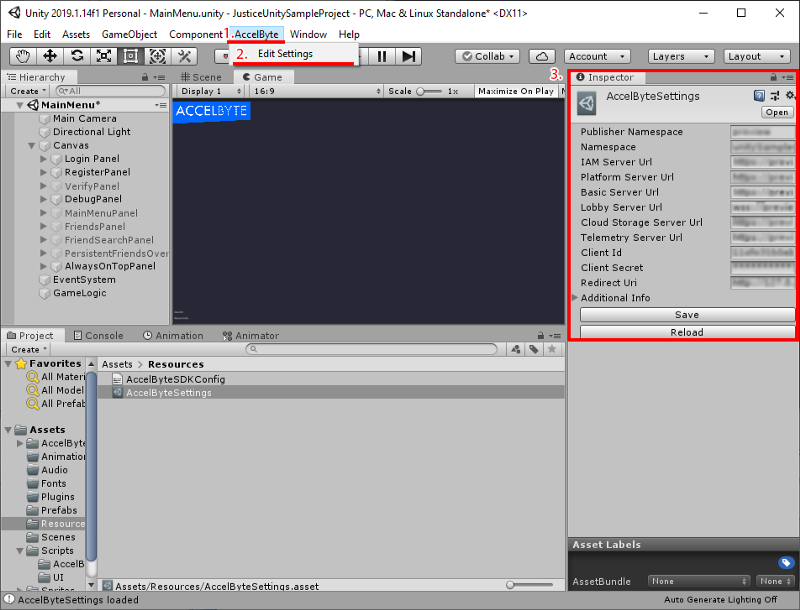
Once we import the SDK into the Unity Project, you’ll see an “AccelByte” menu option appear in the top menu. We need to configure the credentials we’ll be using to connect to the backend, to do so click the “AccelByte” menu, then “Edit Settings” and fill out the appropriate values in the Inspector window:
With our AccelByte Identity and Account Management features, we have many ways of authenticating a user. We can do headless auth via unique identifiers, login with Steam, Epic, Xbox, PlayStation or other third parties, etc
This guide, however, will focus on the traditional Email Registration, Verification, and Authentication. Future guides will focus on our other authentication methods.
Our general flow for this example will be:
One of the many great things about the AccelByte SDK is that it manages its own Unity GameObject instance. There’s no need to create an empty GameObject, assign the would-be “AccelByteManager” script to it and ensure it is in every scene you wish to use it.
When you call an AccelByte value or function, the SDK will create and manage itself in the active scene:

So let’s look at what happens when the User opens our game:
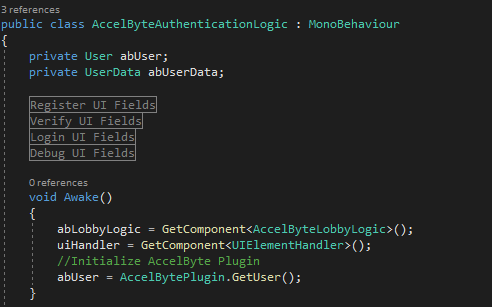
The first thing we do is to initialize our plugin in the scene. We do this by using the GetUser function. Naturally, this will get an empty user object which means we need to log this user in to fill it with useful data.
However, before we log a user in we must first Register a user.
Registration is fairly simple, so simple in fact that to start the process it’s just two small functions.
First, we have our Registration code:
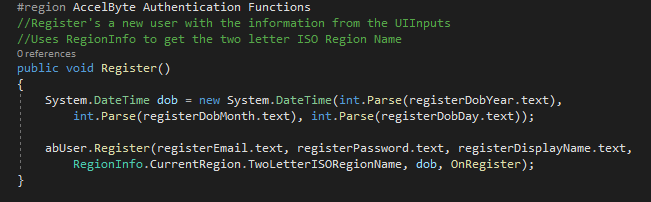
This code is hooked up to a few input fields and dropdown menus.
The first thing we are doing is converting the date of birth text fields into the System.DateTime format.
Secondly, we call our User.Register function, which sends the information to the server. By default to register a user we need:
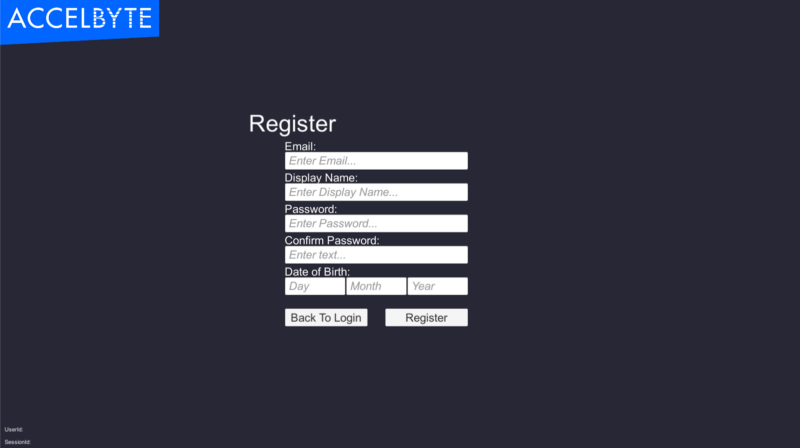
To get this information we are using the Unity UI, our registration form looks like this in the engine:
Our Register() function is tied to the “Register” button’s “OnClick” EventListener. When the event is fired, it sends the registration data to the server and the server sends back a response. However we need a Callback to interpret the data sent back from the server.
Our Callback function looks like:
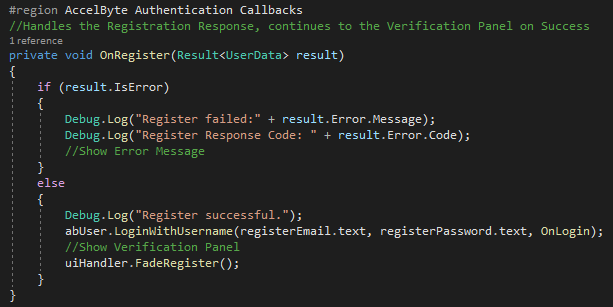
Our Registration Callback takes one Generic Class of “Result” which we populate with various other member classes depending on the task at hand, however in this case we are expecting some “UserData”.
The first thing we do is check if we encountered any errors, if we did we should interpret the error and display some information for the user. These can be anything from the email being already registered to invalid characters present to the service returning a 404 error.
If the request was successful however, we can continue on our registration flow.
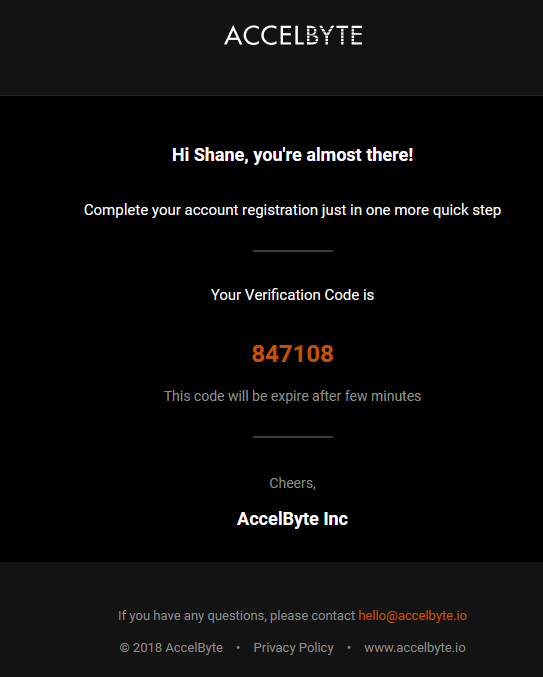
In our default AccelByte configuration, we require that all new users verify their email address, on a successful registration request a user will receive the following email:
Before we can call our Verify() function we must log our user in so they are authorized to make more calls against the service. You can see in our Register code that in the event of a successful login, we take the username and password from the registration UI fields and make a LoginWithUsername call.

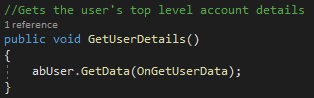
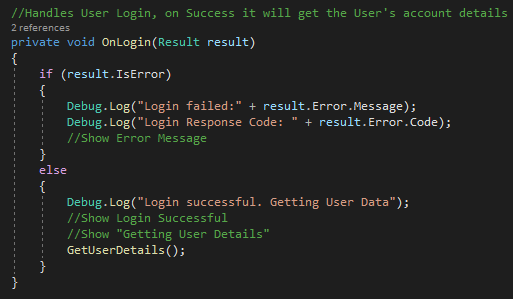
We then fade out our Register UI Panel and let our Login Callback handle things, in this case, it again checks if there were any errors, and on success will attempt to GetUserDetails:

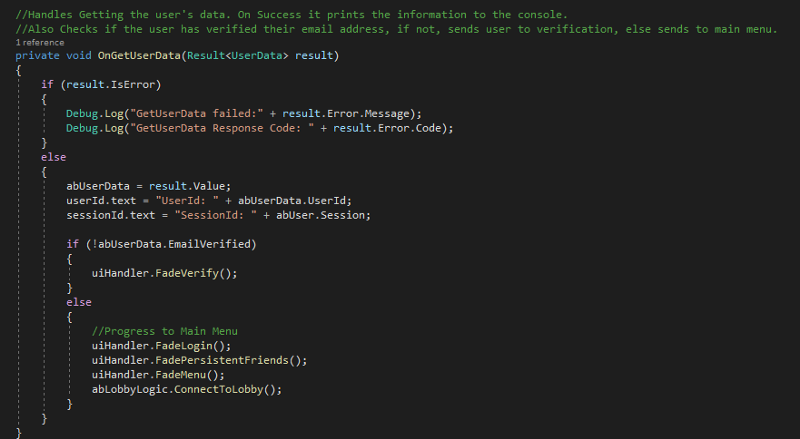
We are using the abUserData object to store and reference the relevant UserData the server sends back. In this case, we are displaying a UserId and SessionId, then checking if the user has verified, if they have we send them to the Main Menu of our game, if not we send the to our Verification UI Panel:
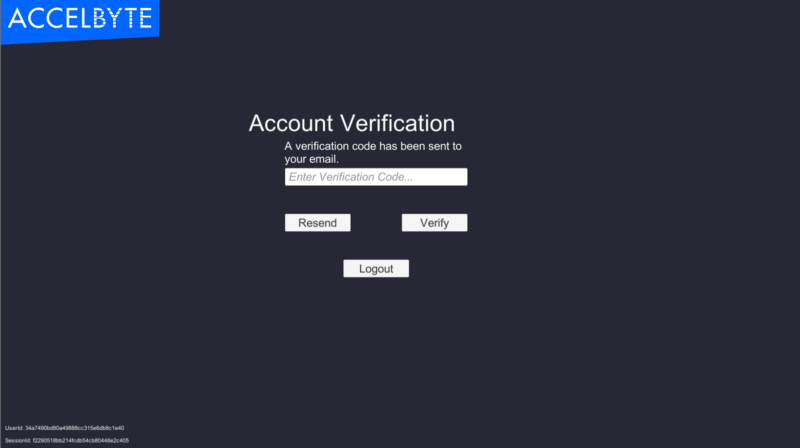
To verify we simply copy our verification code from the email we received into the box and click “Verify” which is hooked to our Verify() function via the button’s OnClick EventListener.
We have two verification functions, the event that sends the code to the server, and an event that requests a new code be emailed to a user:
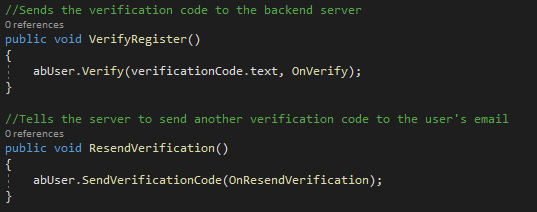
You can see the same pattern we’ve been following, every request parses its response through a callback:
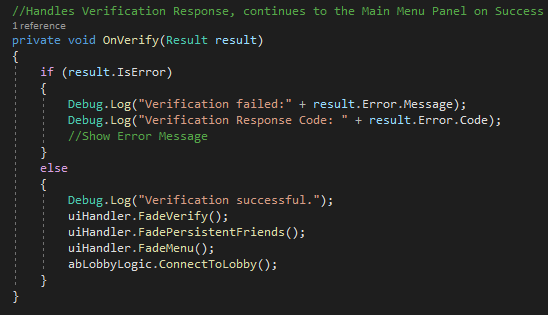
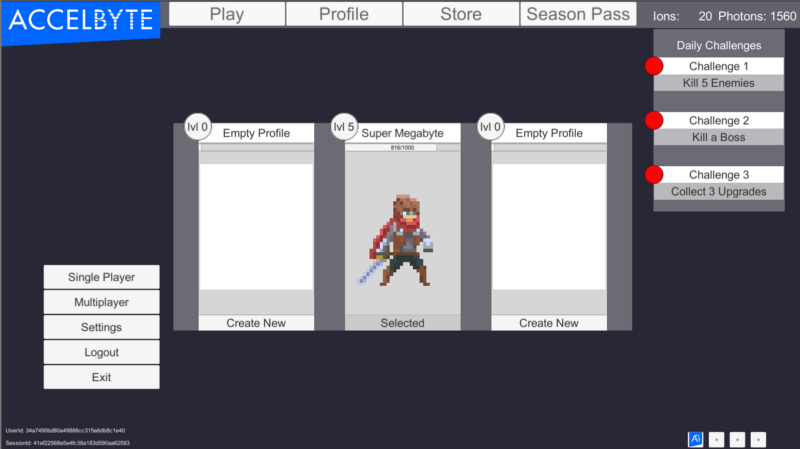
We check for errors, if none, progress the user to our main menu where we have finished the Registration leg of our user journey.
When your user next opens your app and needs to log in we will take the user entered email and password from our UI fields when the Login function is called and send them to the server.

On a successful login we get the user’s details:
Which checks if the user has been verified, which, in this case, they have and sends them straight to the main menu so they can start playing.
And that’s it! While this guide highlights what is available in our out of the box Registration, it is important to note that we can customize the platform to match your exact needs, from small changes to complete bespoke features.
No two games are the same and we believe it is important to tailor our services to match each individual customer’s needs.
Please reach out to us at support@accelbyte.io if you have any questions.
Reach out to the AccelByte team to learn more.