Play
Dynamically assemble and match players
In this guide, we will do a quick rundown of how to find and make friends with AccelByte. This guide is Unity specific but the flow is identical in any other SDK.
You can grab our SDK from our public GitHub: https://github.com/AccelByte/accelbyte-unity-sdk
If you need help getting our SDK going please read our previous entry on Registering and Authenticating Users
With our AccelByte Social and Game Service features, we have a full suite of social tools available for creating your game’s communities. We have the ability to provide Friends, group Parties, Game Profiles, Chat, Notifications, Cloud Storage, Matchmaking and more.
This particular guide is going to focus solely on the Friends Service features, future guides will expand on this to include the others.
Our general flow for this example will be:
Again, we will presume you have followed on from our last guide which shows how to configure your SDK and explains how the SDK manages the AccelByte Instance.
First thing’s first, our Social Service runs on Websockets, this allows us to establish and maintain a connection to the service and we can both send and receive messages, usually with a LOT less overhead than a standard REST request.
Another benefit of Websockets is that, while we can send a request and get a response, the server can also just send us a message apropos of the user doing nothing. This asynchronous behavior is what allows Chat and Notifications to work.
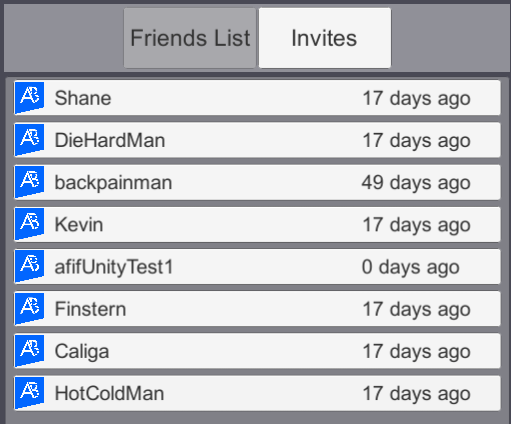
Here’s what our friends list looks like:

To connect to the AccelByte Social Service, you need to do the following:
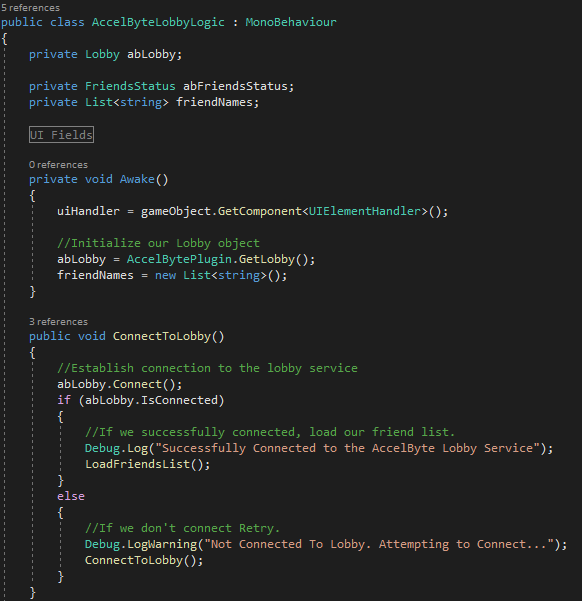
The first thing we do is initialize our Lobby, we do this with the AccelBytePlugin.GetLobby function. This is the object we will use to manage our lobby connection and make all of the calls for friends to work.
Next up is our ConnectToLobby function, this handles the initial websocket connection. If it fails to connect for whatever reason connectivity to services may be unavailable, so naturally we want to retry until we get a solid connection. In a production scenario, you would probably also put this on a timer so as not to hammer the service with requests as fast as possible.
If we successfully connect, we want to load our friends list:
Request:

Response:
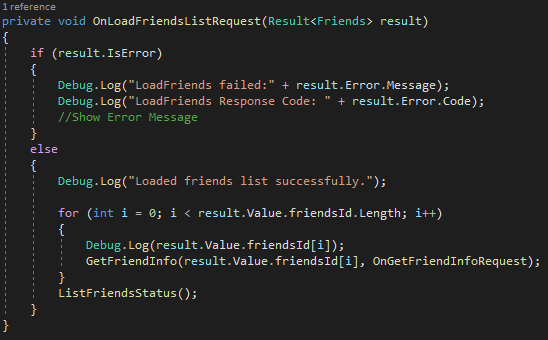
LoadFriendsList returns an array of Friend Ids, which for our game codes purpose is all we really need, but for our User it would be helpful if they could see the Username of their friends.
For each friendId we receive, we get their info using GetUserByUserId which is a function of our IAM service:
Request:

Response:
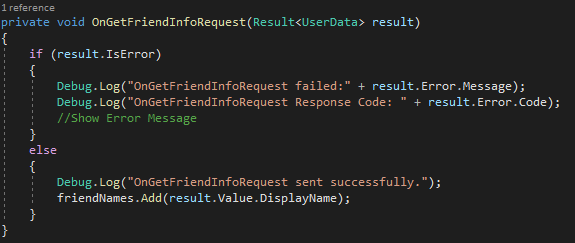
Following our usual pattern in these guides, if there is an error, print it to the console, if not we can proceed. In this case, we add our friend’s display name to an array of friends.
The next thing our LoadFriendsList function does once it processes our array of friend Ids is gets our friends status.
Request:

Response:
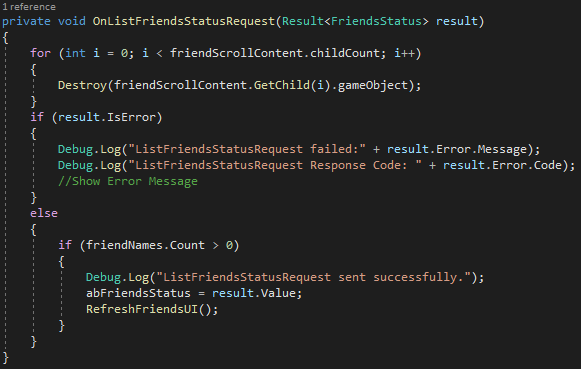
First thing we are doing here is cleaning up our previous “instance” of our friends list. In Unity this is just deleting all Child UI Objects in our ScrollContent, this means all of the tiles in the following UI:
Next, we check if there’s an error getting our friends list. If there is, show an error message. If not assign the Result Value to our FriendsStatus Object, then refresh our UI above.
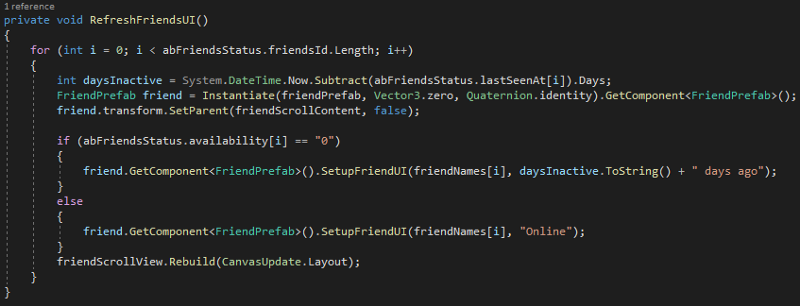
For every friend we have in our FriendStatus array we do the following:
If the days since the friend was last seen is “0” we will consider them online (for now, we will cover the concept of “Presence” in the guide about Notifications)
If the days since last seen is greater than 0 we want to show how long it’s been.
For this we instantiate a Prefab of our friend tile, this has a script assigned to it: “FriendPrefab” this script is simple:
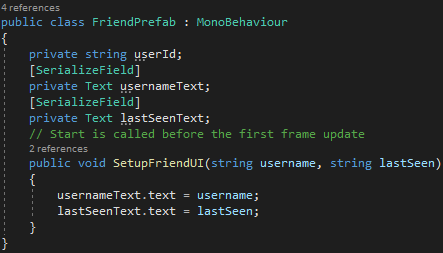
We store the userId for later (Chat, Party, Matchmaking)
We also store the username and last seen values to display to the end user.
Lastly the SetupFriendUI function assigns the string values passed in from the ListFriendsStatus Response to the actual Unity UI components.
With this, our friends list is displayed! But now that we can display our friends list, we need to be able to invite other players to be our friends.
Sending invites consists of two components, searching for and inviting players.
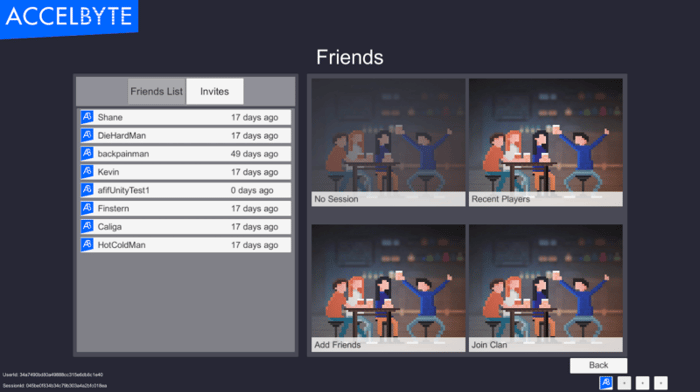
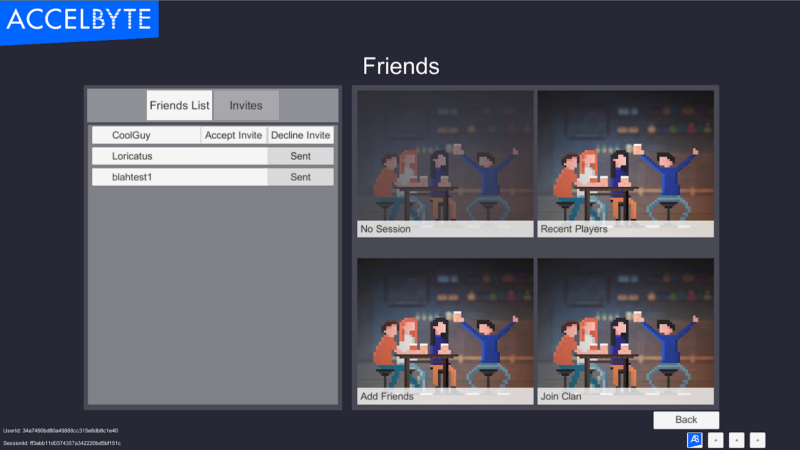
For reference our UI looks like this:
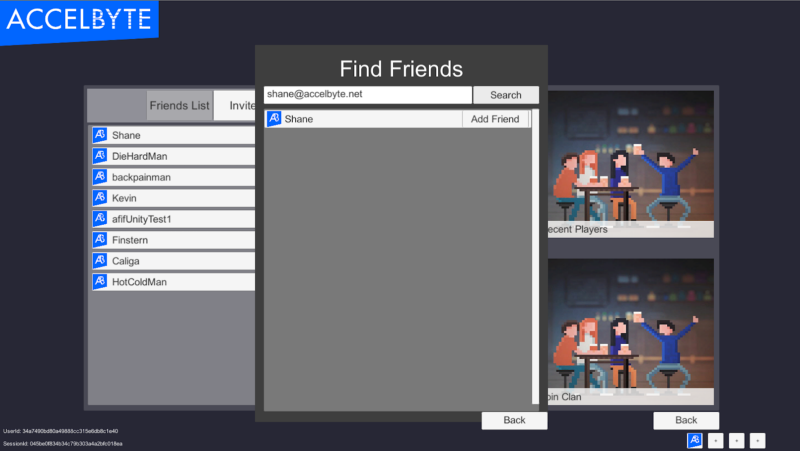
By default we offer a few ways to find other players:
In this example, we will be covering Email Address as this will be the primary way a player would look up their friend.
To search for our user we use GetUserByLoginId which is a function of our IAM service.
Request:

Response:
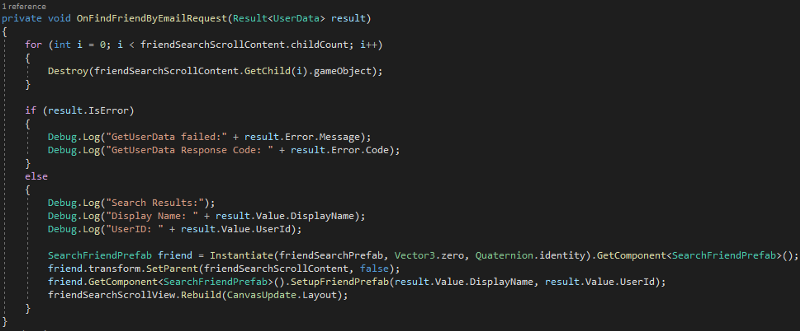
The first thing we are doing here is cleaning up our previous “instance” of our friends list. In Unity this is just deleting all Child UI Objects in our ScrollContent.
Then we check for errors if none are found we instantiate a prefab “search result” UI tile as a child of the Search UI’s “ScrollContent” object. Similar to our friend UI tile, we populate it with a Display Name and UserId.
The script on our Search Result is a little different however as our search result object is responsible for sending the friend request:

Here’s what the script looks like:
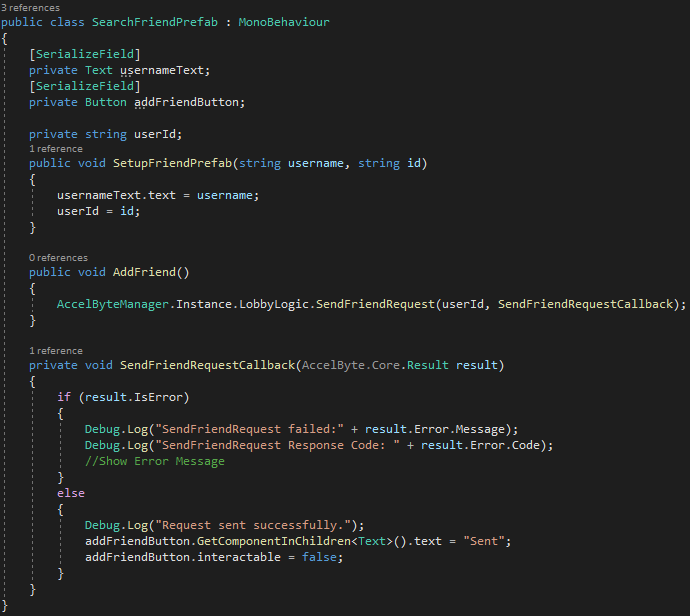
As you can see, it’s quite similar to the FriendPrefab in that it holds the user info of a particular person and is responsible for updating its own UI Text objects. However, the button for sending this friend request exists in the Prefab.
The AddFriend function is hooked the buttons EventTrigger in the Unity Editor, when clicked it triggers the SendFriendRequest, which takes a userId and the callback to send the response to.
The script manages its own response in the SendFriendRequestCallback function. We check for errors, if none, we change the button’s UI Text to say the request was sent and mark it un-clickable.

We need a way to see which invites we’ve sent and which we’ve received.
Our screen looks like this:
For example purposes we are showing both the Incoming Friend Requests and the Outgoing Friend Requests, the pattern should be pretty familiar by now.
Let’s cover the outgoing friend requests first
Request:

Response:

We need to clean up any existing UI Prefabs in our UI, then check for errors. For every friend in our outgoing friend requests, we instantiate an “Invitation” prefab, which consists of a Username and a “Sent” indicator.
Similar to before, each of these prefabs has its own script to manage the UI tile’s instance given that they each have some level of interaction.
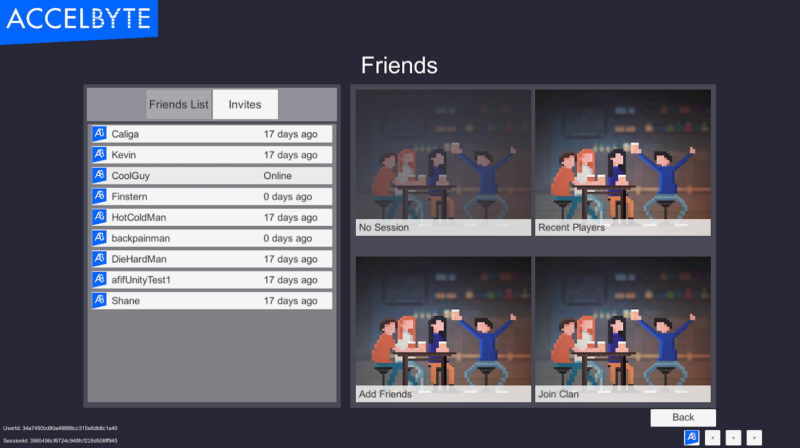
Next we have Incoming Invites, these are a little more interesting as we can choose to accept or decline a friend:
Request:

Response:
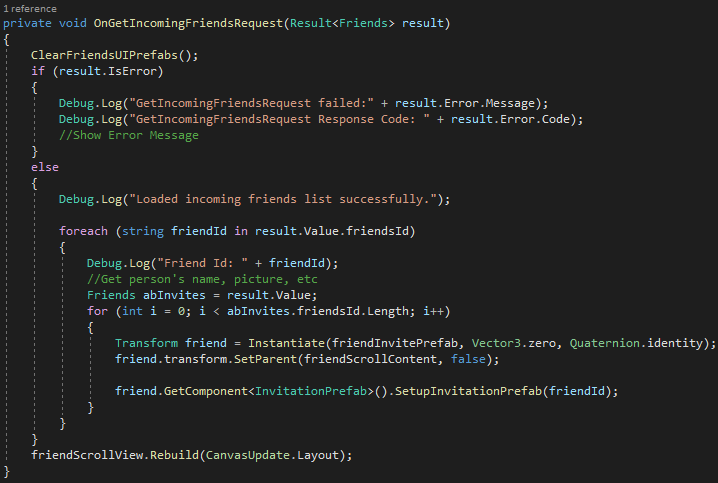
Again, very familiar, clean the existing UI, check for errors, repopulate the UI with the relevant tiles.
The difference here is in the Invitation script:
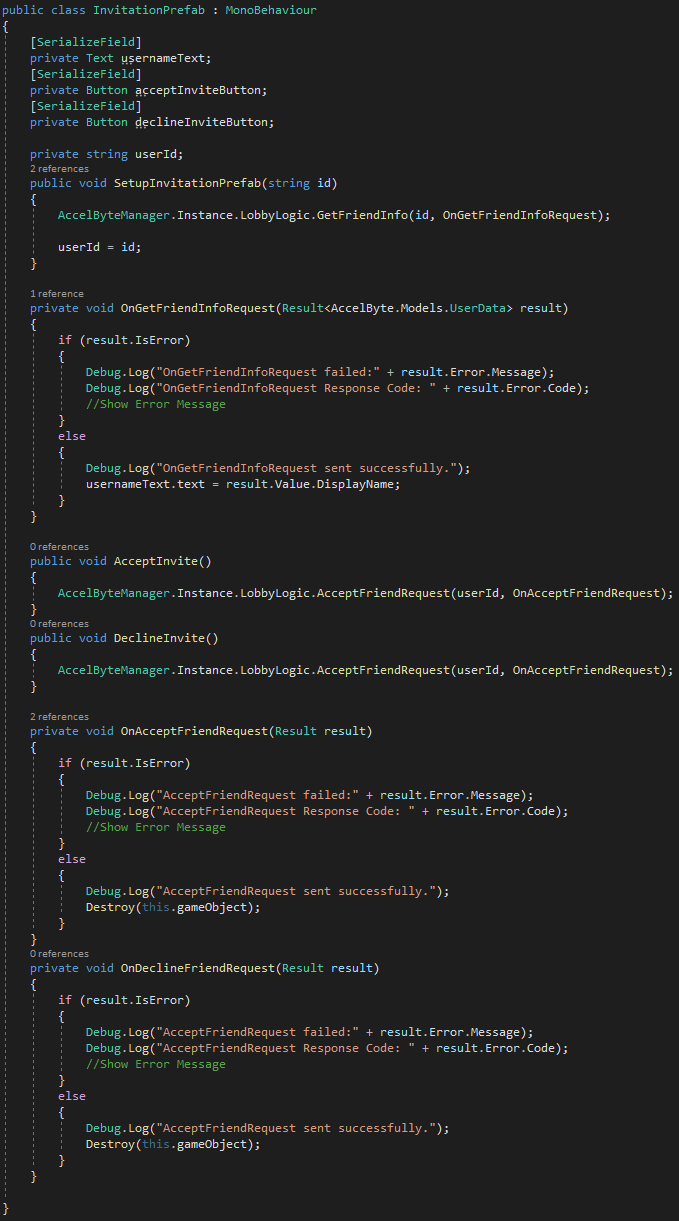
From top to bottom:
Similar to previous Prefab scripts, we want to set up our Invitation tile, however, when we list our incoming/outgoing invite requests, the only identifying information they have is the user Id, for our end users, we need human-readable names, for this we will use our “GetFriendInfo” function from earlier, this is just “GetUserByUserId” in a friendlier name.
In “OnGetFriendInfoRequest” we check for errors, if none, update the UI Text element with the user’s Display Name.
Next, we have AcceptInvite and DeclineInvite and their callbacks. These are hooked up to the Unity UI Button’s Event Trigger:

When fired these will add the user to the friends list, or remove the invite from your own list.
With all that out of the way, our friend “CoolGuy” is now added to our overall friends list:
And that’s it for the friends system! The only feature we have not covered here is Unfriending which should be fairly a fairly straight forward process now that we’ve covered the general pattern for events, that said, it is important to note that we can customize the platform to match your exact needs, from small changes to complete bespoke features.
No two games are the same and we believe it is important to tailor our services to match each individual customer’s needs.
Reach out to us at support@accelbyte.io if you have any questions.
Reach out to the AccelByte team to learn more.